
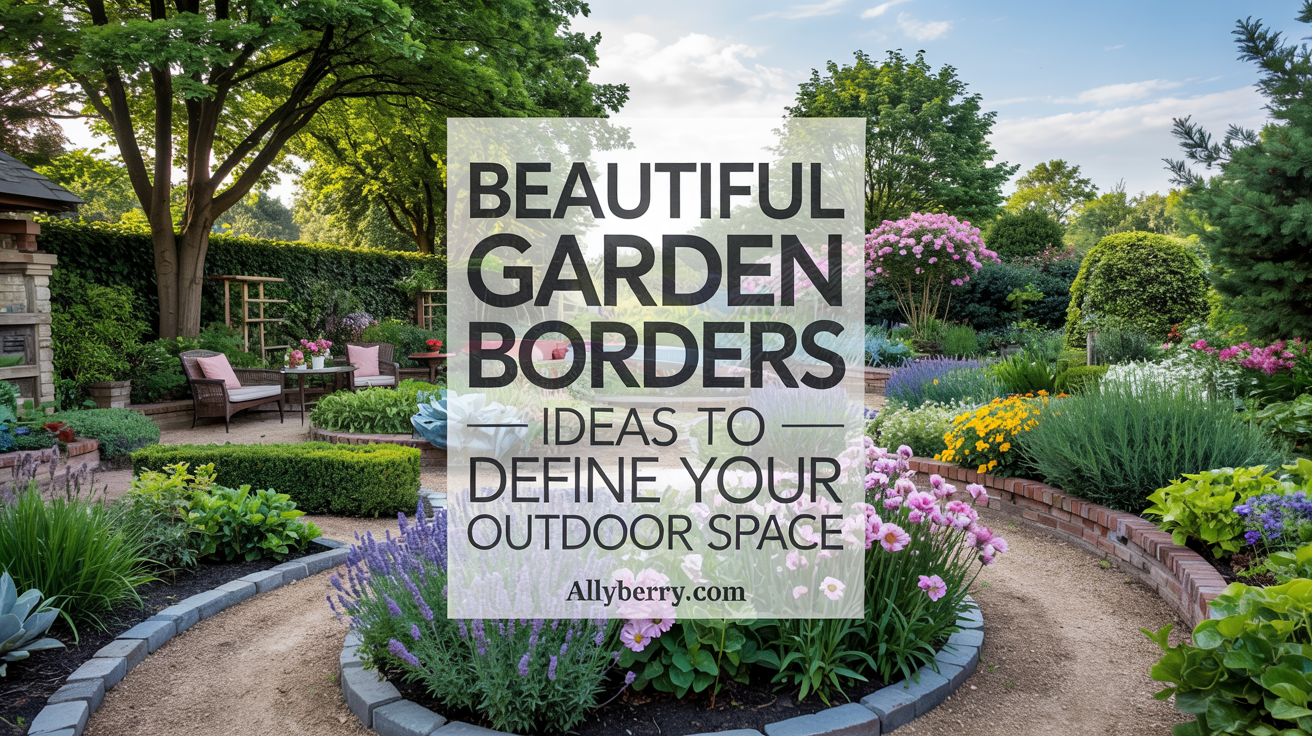
Creating a well-defined outdoor area can transform your space into a functional and visually appealing retreat. Whether you’re working with a small patio or a sprawling yard, adding borders can make a big difference. They help organize your plants and give your landscaping a polished look.
From budget-friendly plastic to elegant terracotta, there are countless materials to choose from. If you’re eco-conscious, options like glass bottle edging or natural log borders are both stylish and sustainable. These choices not only enhance your garden but also reflect your personal style.
For more DIY inspiration, visit ALLYBERRY.COM. You’ll find tips and tricks to elevate your outdoor projects. Don’t forget to check out the Allyberryblogger Pinterest board for creative layouts and visual ideas. Let’s make your space truly special!
Key Takeaways
- Garden borders enhance both aesthetics and functionality.
- Choose from materials like plastic, terracotta, or eco-friendly options.
- Glass bottle edging and natural logs are sustainable choices.
- Visit ALLYBERRY.COM for more DIY garden inspiration.
- Explore the Allyberryblogger Pinterest board for creative layouts.
Introduction to Garden Borders
Borders are a simple yet effective way to organize your plants and enhance your landscaping. They create structure, prevent grass from encroaching on your flower beds, and add visual appeal to your outdoor space. Whether you prefer a rustic or modern look, borders can help you achieve the design you envision.
When choosing borders, it’s important to balance aesthetics with practicality. For example, materials like brick and stone are durable and timeless, while wood offers a warm, natural feel. If you’re eco-conscious, consider repurposed materials like glass bottles or living shrubs. These options not only look great but also support sustainability.
“Your garden borders should reflect your personal style while serving a functional purpose.”
Here’s a quick overview of popular border types and their features:
| Type | Material | Features |
|---|---|---|
| Brick | Clay | Durable, classic |
| Stone | Natural stone | Timeless, sturdy |
| Wood | Cedar, pine | Warm, natural |
| Recycled | Glass bottles | Eco-friendly, creative |
| Living | Shrubs, grass | Natural, low-maintenance |
For more tips on maintaining your borders throughout the seasons, visit ALLYBERRY.COM. You’ll find expert advice and inspiration to keep your outdoor space looking its best.
Plastic Edging: A Budget-Friendly Option
Plastic edging offers a practical and affordable way to define your lawn and beds. It’s a popular choice for homeowners looking to organize their outdoor space without spending a fortune. With rolls costing around $18, it’s a cost-effective solution that doesn’t compromise on functionality.

Installation Tips for Plastic Edging
Installing plastic edging requires some preparation. Start by digging a trench along the area where you want to place the edging. This ensures it sits securely in the soil. Handling the rolls can be tricky, so having a helper makes the process smoother.
While plastic edging is durable, it may warp in freezing climates. If this happens, simply tap it back into place in the spring. To enhance its appearance, pair it with mulch or gravel. This combination not only looks polished but also helps retain moisture in your beds.
For more tips on pairing plastic edging with drought-resistant plants, visit ALLYBERRY.COM. Their guide provides expert advice to make your landscaping project a success.
| Feature | Details |
|---|---|
| Cost | ~$18 per roll |
| Installation | Trench digging, teamwork required |
| Durability | May warp in freezing climates |
| Maintenance | Tap back in spring |
| Pairing | Mulch or gravel for a polished look |
Glass Bottle Edging: Eco-Friendly and Creative
Glass bottle edging brings a unique, eco-friendly touch to your landscape. This creative approach transforms recycled materials into stunning borders that add character to your space. By repurposing wine or beer bottles, you can create colorful, zero-cost edges that reflect your personal style.
To get started, insert the bottles upside down into the soil. This creates a unique pattern that catches the eye. Arrange them by color or size for a whimsical or structured design. Make sure to bury them deep enough to prevent tipping, especially in windy areas.
This method is ideal for cottage gardens or eco-conscious landscapes. It’s a great way to reduce waste while adding a personal touch to your outdoor space. For more inspiration, check out ALLYBERRY.COM’s recycling projects. Their Allyberryblogger Pinterest board offers creative ideas for bottle arrangements.
- Repurpose wine or beer bottles for colorful, zero-cost borders.
- Arrange by color or size for a whimsical or structured look.
- Bury bottles deep enough to ensure stability.
- Perfect for cottage gardens or eco-friendly designs.
- Explore ALLYBERRY.COM for more recycling ideas.
Glass bottle edging is more than just a border—it’s a statement. It combines sustainability with artistic flair, making your outdoor space truly one-of-a-kind.
Hand Edging: A Natural and Labor-Intensive Choice
For those who prefer a minimalist look, hand edging is a labor-intensive but rewarding choice. It allows you to create crisp, clean lines for your lawn and beds without the need for physical barriers. This method is ideal for gardeners who enjoy hands-on work and want to enlarge their beds as plants grow.

Using tools like edging shovels or electric edgers, you can achieve precise edges that define your space beautifully. However, this approach requires annual maintenance to prevent grass from overgrowing into your beds. Refreshing the edge every 1-2 years ensures it stays sharp and effective.
Pairing hand edging with mulch not only enhances the contrast but also helps suppress weeds. This combination keeps your lawn and beds looking neat and well-maintained. If you’re new to this technique, I recommend checking out ALLYBERRY.COM’s tutorial on using electric edgers. It’s a great resource for mastering this natural and precise method.
- Create crisp, minimalist lines without physical barriers.
- Best for gardeners who prefer enlarging beds as plants grow.
- Requires annual maintenance to prevent grass overgrowth.
- Pair with mulch for contrast and weed suppression.
- Explore ALLYBERRY.COM’s tutorial for expert guidance.
Eucalyptus Wood Border: Rustic and Warm
Eucalyptus wood borders bring a rustic charm to any outdoor setting. Priced at around $7 per linear foot, this option is both affordable and visually appealing. Its natural texture and warm tones make it a standout choice for defining your space.

This type of border blends seamlessly with tropical or Mediterranean garden themes. Its natural resistance to pests and moisture makes it ideal for warm climates. For best results, install it in sun-drenched areas to prevent rot and maintain its durability.
To enhance its longevity, season the wood with linseed oil. This simple step protects it from weathering and keeps it looking fresh. Pair it with gravel or mulch for a polished finish that complements your coastal gardens.
“Eucalyptus wood borders add warmth and character to any landscape.”
For more inspiration on designing with eucalyptus, visit ALLYBERRY.COM. Their coastal garden design guide offers practical tips to elevate your outdoor projects. Let’s create a space that’s both functional and inviting!
Cedar Edging: Simple and Durable
Cedar edging offers a simple yet durable solution for defining your outdoor areas. Its natural wood texture blends seamlessly into any landscape, making it a popular choice for herb gardens or vegetable beds. Plus, it’s inexpensive, making it accessible for any budget.

To install cedar edging, hammer cedar shingles into the ground for a low-profile, natural edge. Its modular design allows you to replace warped sections easily, ensuring your border stays neat and functional. However, be mindful of damage risks from trimmers, as cedar can be susceptible to nicks and cuts.
For added longevity, treat the wood with an eco-friendly sealant. This protects it from weathering and keeps it looking fresh for years. If you’re new to cedar maintenance, I recommend checking out Allyberryblogger’s cedar maintenance checklist for expert tips.
- Hammer cedar shingles for a low-profile, natural border.
- Ideal for herb gardens or vegetable beds.
- Replace warped sections easily due to modular design.
- Treat with eco-friendly sealant to prolong lifespan.
- Explore Allyberryblogger’s cedar maintenance checklist for guidance.
Cedar edging is more than just a border—it’s a practical and stylish addition to any outdoor space. Its simplicity and durability make it a go-to choice for gardeners who value both form and function.
Woven Willow Edging: Traditional and Charming
Woven willow edging adds a touch of old-world charm to any landscape. Known as “wattle,” this method has been popular in Europe for centuries. It’s a traditional and charming way to define your gardens while adding a rustic aesthetic.

To create this look, weave willow twigs into a flexible border. Young, flexible shoots are easier to shape and provide a natural, organic feel. This technique is perfect for achieving a cottagecore vibe in your landscaping.
However, woven willow edging is prone to weather damage. To keep it looking fresh, refresh the border every 3-4 years. Pair it with lavender or roses for a timeless and enchanting appeal.
“Wattle edging brings a natural and artistic touch to any outdoor space.”
For a step-by-step guide, visit ALLYBERRY.COM’s wattle-weaving workshop. Their expert tips will help you master this traditional technique and create a border that’s both functional and beautiful.
| Feature | Details |
|---|---|
| Material | Willow twigs |
| Style | Traditional, rustic |
| Maintenance | Refresh every 3-4 years |
| Pairing | Lavender, roses |
| Workshop | ALLYBERRY.COM’s wattle-weaving guide |
Natural Log Edging: Repurposing Nature
Using fallen trees for edging adds a rugged, organic touch to your space. This method is not only sustainable but also brings a rustic charm to your landscape. By repurposing logs from storms, you can create a unique and eco-friendly border that blends seamlessly with nature.

Start by salvaging logs after storms for a rugged, organic look. This approach is perfect for those who want to incorporate natural elements into their gardens. To ensure longevity, treat the logs with borax. This simple step deters termites and fungi, keeping your edging intact for 2-3 years.
You can align the logs vertically for added height or horizontally for a more subtle effect. This flexibility allows you to customize the look to suit your space. Natural log edging is ideal for woodland or permaculture gardens, where it complements the surroundings effortlessly.
“Log edging brings a natural and artistic touch to any outdoor area.”
For more inspiration, check out Allyberryblogger’s log-staining techniques on Pinterest. Their creative ideas will help you transform fallen branches into functional and stylish borders. Let’s make your ground truly special with this sustainable and beautiful option!
Landscape Timber Edging: Cost-Effective and Long-Lasting
Landscape timber edging is a practical solution for creating structured and durable borders. It’s a cost-effective option that adds both functionality and a natural aesthetic to your outdoor space. Whether you’re defining flower beds or creating terraced gardens, this method is both efficient and visually appealing.

For best results, use pressure-treated timbers. This prevents rot, especially in wet climates, ensuring your edging remains long-lasting. If you want to match your decking or pergolas, consider staining or painting the timbers. This simple step can unify your outdoor design.
Installation requires some leveling and saw skills, but the effort is worth it. Anchor the timbers with rebar stakes for added stability, especially in sloped yards. This ensures your borders stay firmly in place, even in challenging soil conditions.
- Use pressure-treated timbers to prevent rot in wet climates.
- Stain or paint to match existing outdoor structures.
- Anchor with rebar stakes for stability in sloped areas.
- Ideal for terraced gardens or uneven landscapes.
For a step-by-step guide, check out ALLYYBERRY.COM’s timber-edging DIY kit. It’s packed with tips and tricks to make your project a success. Let’s create a space that’s both functional and beautiful!
Pound-In Plastic Edging: Easy and Efficient
Looking for an easy way to create clean edges in your yard? Pound-in plastic edging is the answer. This method is perfect for solo installation, taking less than an hour with just a mallet. It’s a quick and practical solution for defining your lawn or flower beds.

One of the best features of this edging is its durability in freeze/thaw conditions. If winter heaving shifts the border, simply tap it back into place in the spring. This makes it a reliable choice for colder climates.
Choose from brown or green blends to mimic natural materials. Pair it with gravel paths for a cohesive design that enhances your outdoor space. However, avoid placing it near high-traffic areas to prevent dislodging.
“Pound-in plastic edging is a beginner-friendly option that combines simplicity with functionality.”
For more tips on maintaining your edging in cold weather, check out Allyberry’s cold-climate gardening guide. It’s packed with expert advice to keep your lawn looking sharp year-round.
| Feature | Details |
|---|---|
| Installation | Solo, under an hour with a mallet |
| Durability | Withstands freeze/thaw cycles |
| Colors | Brown or green blends |
| Pairing | Gravel paths for cohesive design |
| Placement | Avoid high-traffic areas |
Scalloped Terracotta Edging: Elegant and Functional
Transform your pathways with the timeless charm of scalloped terracotta edging. This elegant option not only defines your space but also adds a touch of Mediterranean flair to your landscaping. Its curved design creates soft, flowing lines that complement both flowers and succulents.

Installation is straightforward when you use sand beds for leveling. This ensures the edging sits evenly and stays secure. For those in colder climates, frost-resistant options are available, making it a functional choice for northern zones.
Pair scalloped terracotta with herbs or succulents for a striking texture contrast. This combination enhances the visual appeal while keeping maintenance low. For tips on caring for your terracotta, check out ALLYBERRY.COM’s detailed guide.
“Scalloped terracotta edging blends beauty and practicality, making it a standout choice for any landscape.”
- Create Mediterranean vibes with curved terracotta.
- Install on sand beds for easy leveling.
- Frost-resistant options available for northern zones.
- Pair with succulents or herbs for texture contrast.
- Explore ALLYBERRY.COM’s terracotta care tips.
Concrete Wall Edging: Permanent and Stylish
Concrete wall edging offers a durable and visually striking way to define your outdoor space. Its permanent nature makes it ideal for those looking for a long-term solution. Whether you’re designing a modern landscape or a minimalist retreat, this option delivers both strength and elegance.

For curved or tall walls, hiring masons for professional installation is recommended. Their expertise ensures precision and stability, especially for complex designs. This approach guarantees a polished finish that enhances your overall design.
Customization is a key advantage of concrete wall edging. You can embed stones or mosaic tiles to add texture and personality. This flexibility allows you to create a unique look that complements your outdoor theme. For modern or minimalist gardens, it’s a perfect match.
“Concrete wall edging combines functionality with aesthetic appeal, making it a standout choice for any landscape.”
To prevent cracking, ensure proper drainage during installation. This step is crucial for maintaining the integrity of your wall. For an aged patina, consider staining the concrete with acid-based solutions. This technique adds character and depth to your edging.
For more inspiration, explore Allyberryblogger’s concrete wall inspiration board. It’s packed with creative ideas to elevate your project. Let’s make your outdoor space truly special with this stylish and enduring option!
| Feature | Details |
|---|---|
| Material | Concrete |
| Customization | Embedded stones, mosaic tiles |
| Installation | Professional masons for curved/tall walls |
| Maintenance | Ensure proper drainage, stain for patina |
| Inspiration | Allyberryblogger’s concrete wall board |
Grass and Shrub Edging: Living Borders
Living borders combine nature and structure to create a dynamic outdoor space. By mixing grasses and flowering bushes, you can achieve a colorful display that evolves with the seasons. This approach not only defines your area but also adds texture and movement to your landscape.

For structured lines, consider using dwarf fountain grass or liriope. These plants provide a clean, organized look while remaining low-maintenance. Intersperse them with hydrangeas or spirea to add seasonal interest. Their bloom times ensure your space remains vibrant throughout the year.
Annual trimming is essential to maintain the shape and density of your living borders. This simple step keeps your shrubs and grasses looking neat while encouraging healthy growth. Plus, these borders attract pollinators, making your space both functional and eco-friendly.
- Use dwarf fountain grass or liriope for clean, structured lines.
- Add hydrangeas or spirea for seasonal color and texture.
- Trim annually to maintain shape and encourage growth.
- Attract pollinators while defining your outdoor area.
For more inspiration on pairing shrubs and grasses, visit ALLYBERRY.COM’s shrub pairing guide. Their expert tips will help you create a living border that’s both beautiful and functional. Let’s transform your space with nature’s touch!
Brick Wall Edging: Classic and Timeless
Brick wall edging brings a classic and timeless appeal to any outdoor space. Its sturdy structure and traditional look make it a favorite for defining pathways, flower beds, or lawns. Whether you’re aiming for a formal garden or a rustic retreat, brick edging adds both functionality and charm.

One of the key advantages of brick wall edging is its versatility. You can choose herringbone or stacked patterns for a traditional aesthetic. For a vintage touch, consider using reclaimed bricks. These not only add character but also support sustainability by repurposing materials.
To soften the look, line your brick edging with creeping thyme. This low-growing plant adds a touch of greenery and complements the texture of the bricks. It’s a simple way to blend hardscaping with natural elements.
“Brick wall edging is a durable and elegant choice that stands the test of time.”
Maintenance is minimal but essential. Occasional repointing ensures the mortar stays intact, preserving the integrity of your wall. For those new to brickwork, Allyberryblogger’s brick-laying tutorial on Pinterest offers step-by-step guidance.
- Choose herringbone or stacked patterns for traditional appeal.
- Use reclaimed bricks for a vintage, eco-friendly look.
- Line with creeping thyme to soften the edges.
- Repoint occasionally to maintain structural integrity.
- Explore Allyberryblogger’s tutorial for expert tips.
Here’s a quick overview of brick wall edging features:
| Feature | Details |
|---|---|
| Patterns | Herringbone, stacked |
| Material | Reclaimed or new bricks |
| Softening | Creeping thyme |
| Maintenance | Occasional repointing |
| Resources | Allyberryblogger’s tutorial |
Brick wall edging is more than just a border—it’s a statement of timeless design. Its durability and elegance make it a go-to choice for anyone looking to enhance their outdoor space.
Conclusion: Defining Your Outdoor Space with Beautiful Garden Borders
Your outdoor area can become a functional and stylish retreat with the right borders. From plastic and wood to stone and living options, there’s a choice for every style. Eco-friendly materials like logs and glass bottles add a unique, sustainable touch to your space.
Mixing materials can create a one-of-a-kind look for your landscaping. Combine textures and colors to match your personal taste. For more inspiration, visit ALLYBERRY.COM for detailed project plans and ideas.
Don’t forget to explore Allyberryblogger’s Pinterest for the latest trends in border styling. Whether you’re defining pathways or flower beds, the right borders can transform your garden into a cohesive and inviting retreat.
FAQ
What’s the easiest way to create a border for my yard?
I’d recommend pound-in plastic edging. It’s quick to install, affordable, and works well for defining spaces without much effort.
How can I make my outdoor area more eco-friendly?
Try glass bottle edging! It’s a creative way to recycle materials while adding a unique touch to your landscape.
What’s a durable option for edging that lasts for years?
Cedar edging is my go-to. It’s naturally resistant to rot and insects, making it a long-lasting choice for your beds and borders.
Can I use natural materials for edging?
Absolutely! Natural log edging or woven willow are great options. They bring a rustic charm and blend seamlessly with the environment.
What’s the best way to edge a flower bed with a classic look?
Brick wall edging is timeless. It’s sturdy, elegant, and complements both traditional and modern designs.
How do I maintain a living border like grass or shrubs?
Regular trimming and watering are key. I’ve found that choosing low-maintenance plants like perennials makes upkeep easier.
Is there a permanent edging solution?
Concrete wall edging is a solid choice. Once installed, it’s durable and adds a sleek, modern style to your outdoor space.
What’s a cost-effective option for edging?
Landscape timber edging is budget-friendly and easy to install. It’s perfect for creating clean lines in your yard.
Can I add a touch of elegance to my garden borders?
Scalloped terracotta edging is both functional and stylish. Its curved design adds a refined look to any area.
How do I choose the right edging for my space?
Consider your style, budget, and maintenance preferences. I always think about how the material complements the overall design of my yard.
No responses yet