
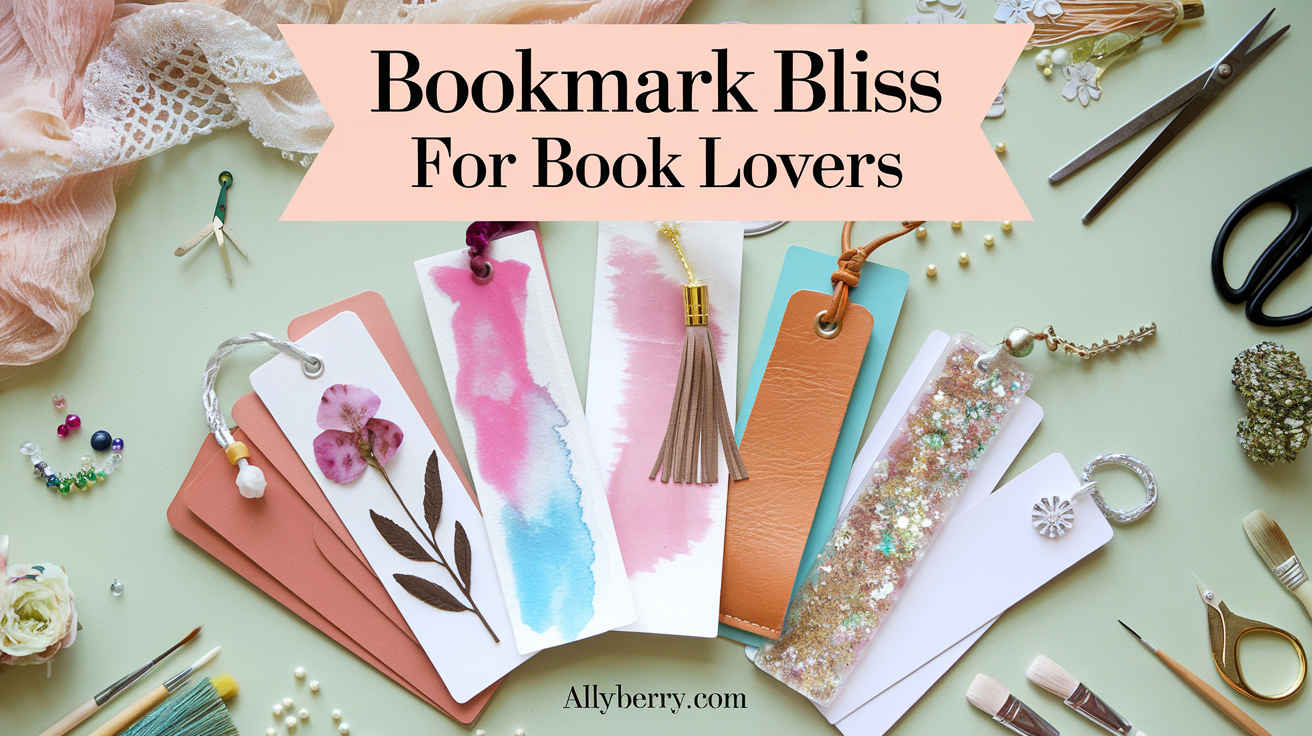

Whether you’re looking for a thoughtful handmade gift for a fellow book lover or just want to jazz up your own collection, these DIY bookmarks are sure to bring a little extra joy to any reading session. Crafting your own bookmark is a fun, easy project that not only adds a personal touch but also makes for a delightful, budget-friendly gift. Let’s dive into 10 stunning bookmark designs that will wow any bookworm!
Supplies Needed for Most Projects:
- Cardstock paper
- Watercolor paints or markers
- Decorative ribbons
- Scissors
- Hole puncher
- Laminating sheets (optional)
- Stickers, washi tape, or pressed flowers for embellishments
1. Pressed Flower Bookmarks

Materials: Cardstock, pressed flowers, clear contact paper, hole punch, ribbon
Instructions:
- Choose your pressed flowers and lay them out on a piece of cardstock.
- Carefully seal the flowers onto the bookmark with clear contact paper.
- Punch a hole at the top and add a decorative ribbon for a classic, elegant finish.
Hint: Laminating the bookmark adds extra durability.
2. Watercolor Wash Bookmarks

Materials: Watercolor paper, watercolors, brush, waterproof pen
Instructions:
- Create a watercolor wash background with your favorite blend of colors.
- Once dry, use a waterproof pen to write a meaningful quote or doodle a fun design on the bookmark.
Hint: Use metallic watercolor paints for an extra shimmer!
3. Faux Leather Bookmarks

Materials: Faux leather fabric, scissors, hole punch, tassels
Instructions:
- Cut your faux leather into bookmark-sized strips.
- Punch a hole at the top and add a tassel for a sleek, professional look.
Hint: Monogram the bookmark using a stencil and gold paint for personalization.
4. Scrap Fabric Bookmarks

Materials: Fabric scraps, sewing machine or fabric glue, ribbon
Instructions:
- Cut fabric scraps into rectangular shapes and sew or glue the edges to prevent fraying.
- Add a ribbon or lace trim at the top for extra charm.
Hint: Mix and match fabrics for a colorful, boho look.
5. Magnetic Page Markers

Materials: Cardstock, magnets, double-sided tape, decorative paper
Instructions:
- Cut a small rectangle from cardstock, fold it in half, and attach magnets on the inside using double-sided tape.
- Decorate the outside with patterned paper or stickers.
Hint: Personalize these by adding initials or tiny bookish icons!
6. Resin Bookmarks

Materials: Resin kit, bookmark molds, dried flowers or glitter
Instructions:
- Mix the resin according to instructions and pour it into a bookmark mold.
- Add in pressed flowers or glitter for decoration and let it cure completely.
Hint: Experiment with different inclusions like beads or small charms!
7. Upcycled Paper Bookmarks

Materials: Old book pages, cardstock, Mod Podge, ribbon
Instructions:
- Cut an old book page and glue it to a piece of cardstock for stability.
- Cover it with a layer of Mod Podge for protection, then add a ribbon at the top.
Hint: Use old comic book pages for a fun twist!
8. Tassel Bookmark with Beads

Materials: Cardstock, tassels, beads, hole punch
Instructions:
- Cut your cardstock to size and punch a hole at the top.
- Attach a tassel, stringing a few beads onto the end for added flair.
Hint: Match the beads to your book theme for added creativity.
9. Stamped Quote Bookmarks

Materials: Cardstock, rubber stamps, ink pads, decorative stickers
Instructions:
- Use rubber stamps to add quotes, symbols, or patterns to your cardstock.
- Decorate with a few stickers or washi tape.
Hint: Experiment with metallic or pastel ink pads for a fun twist!
10. Button and String Bookmark

Materials: Thick cardstock, buttons, embroidery string, glue
Instructions:
- Punch a hole in the top of your cardstock, thread embroidery string through the hole, and attach a button at the end.
- Wrap the string around the bookmark and secure it with the button closure.
Hint: Use colorful buttons for a whimsical look!
No responses yet